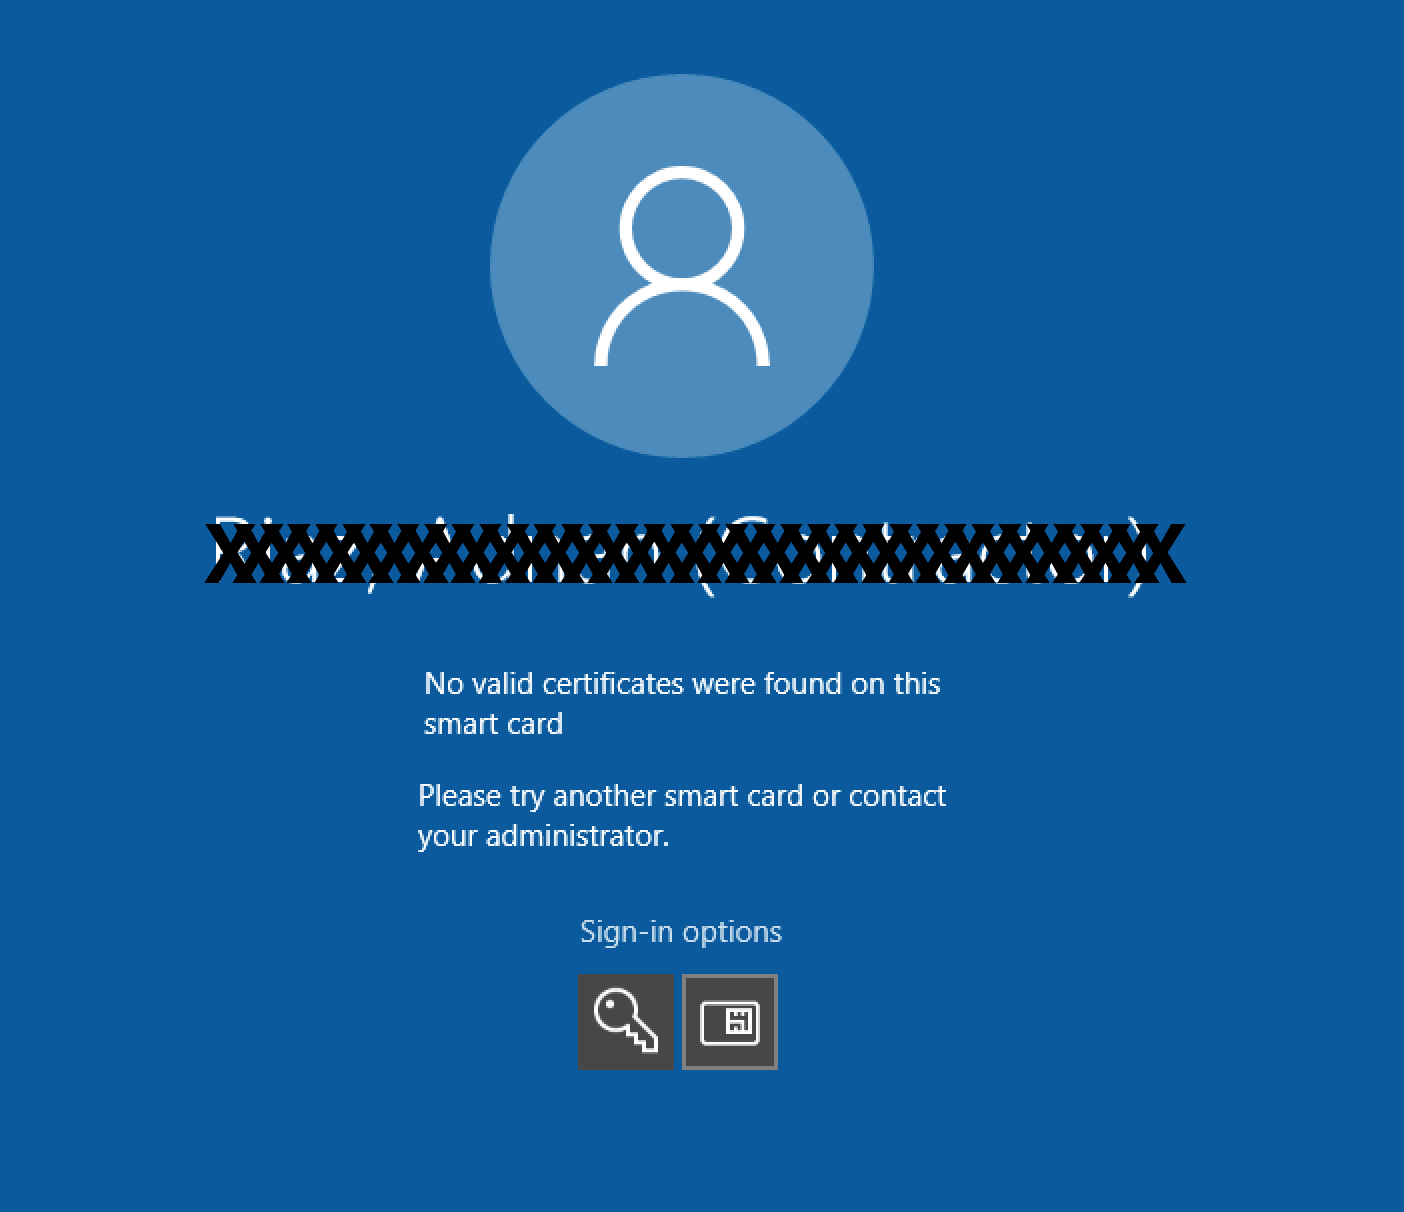
At my work we are required to use Smart Card to login to our systems. It works fine as long as we are logging on to our Macs or our Windows Desktops. Even if we use Remote Desktop connection from our Windows desktops to other Windows machines, it works without any issues. The problem occurs when we try to logon to Windows machines from Macs. There aren’t many Remote Desktop client options available for Mac that support Smart Card redirection. Even Microsoft Remote Desktop client on Mac currently does not support Smart Card redirection. I found a nice client Royal TSX that supports Smart Card redirection and it works fine. Actually it worked fine until Windows 7 and Windows 2012 Server. It stopped working with Windows 8 and Windows 2012 R2. It looks like Microsoft has changed the behavior of Smart Card service in Windows 8 and Windows 2012 R2. When I try to logon to Windows 2012 R2 Server or Windows 8 from Mac using Remote Desktop, I get the error “No valid certificates were found on this smart card” as shown below.
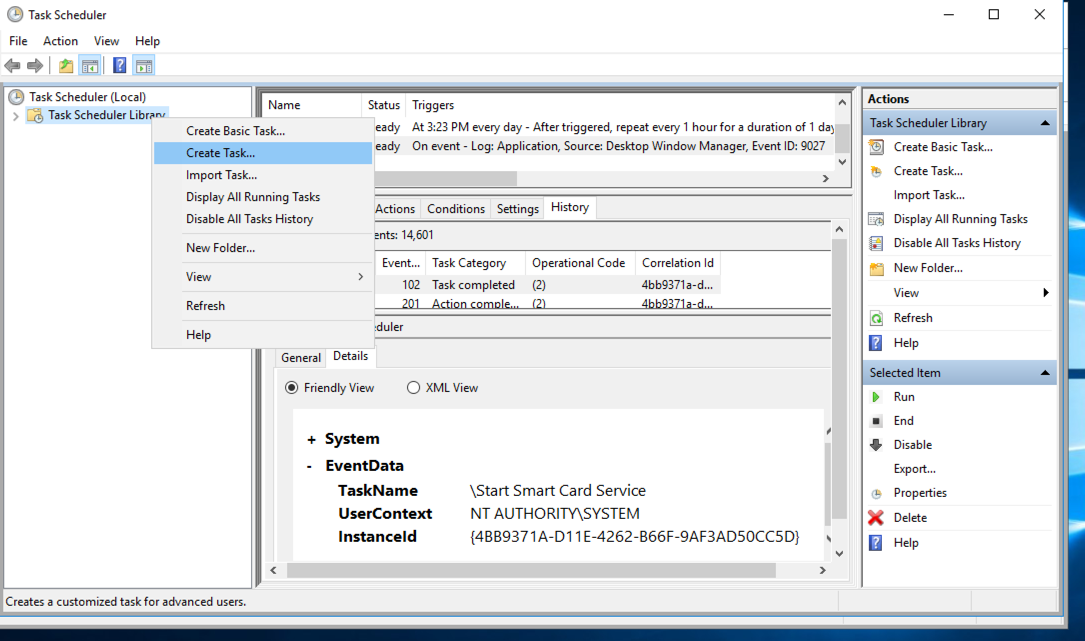
hmmm. The workaround I used for this was to connect to my Windows 7 Virtual Desktop and from there connect to Windows 8, Windows 10 or Windows 2012 R2 machines. This was an ok workaround until recently when my Virtual Desktop was upgraded to Windows 10. I was expecting that this Smart Card issue would have been resolved in Windows 10 but Windows 10 has the same issue. After doing some research online I found out that Microsoft has changed how Smart Card service behaves in Windows 8 and later. The Smart Card service only starts when it detects the Smart Card reader. It looks like when I Remote Desktop from Mac to the Windows machine the Windows machine is unable to detect the Smart Card and therefore the service does not start. I tested it by manually starting the Smart Card service and I was then able to logon to the machine. Now the problem is how can I make sure to start the service when I am connecting via Remote Desktop. I noticed that when I connect using Remote Desktop, the event viewer logs an event “9027” in Application Logs, as shown below.

Now I think that I can use this event and use task scheduler to start the Smart Card service whenever there is this event in the Application Log.
I started the Task Scheduler and created a new Task by using the steps below.
Start Task Scheduler, right-click on Task Scheduler Library and then click on Create Task
Name the task whatever you want, I used “Start Smart Card Service”.
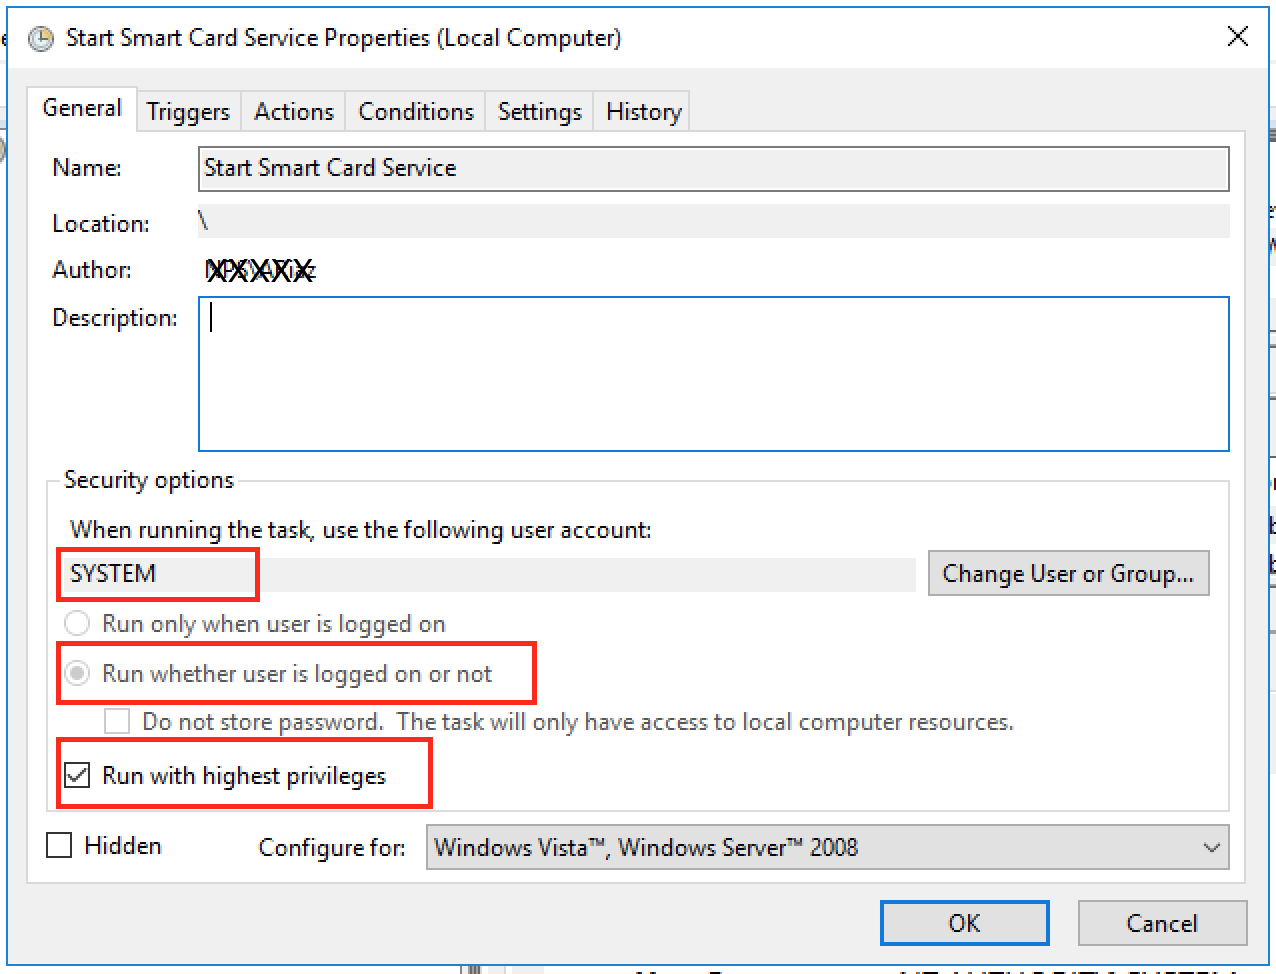
Make sure to use the options as shown in the picture above.
“When running the task, use the following user account:” needs to be set to “SYSTEM”. We want this task to run as SYSTEM user.
“Run whether user is logged on or not” needs to be selected. We want this task to run whether any user is logged on or not.
“Run with highest privileges” needs to be checked. We want this task to run with highest privileges. The task may run fine without checking this box, but I just checked it so that it doesn’t fail because of the lack of any permissions etc.
Now go to “Triggers” tab
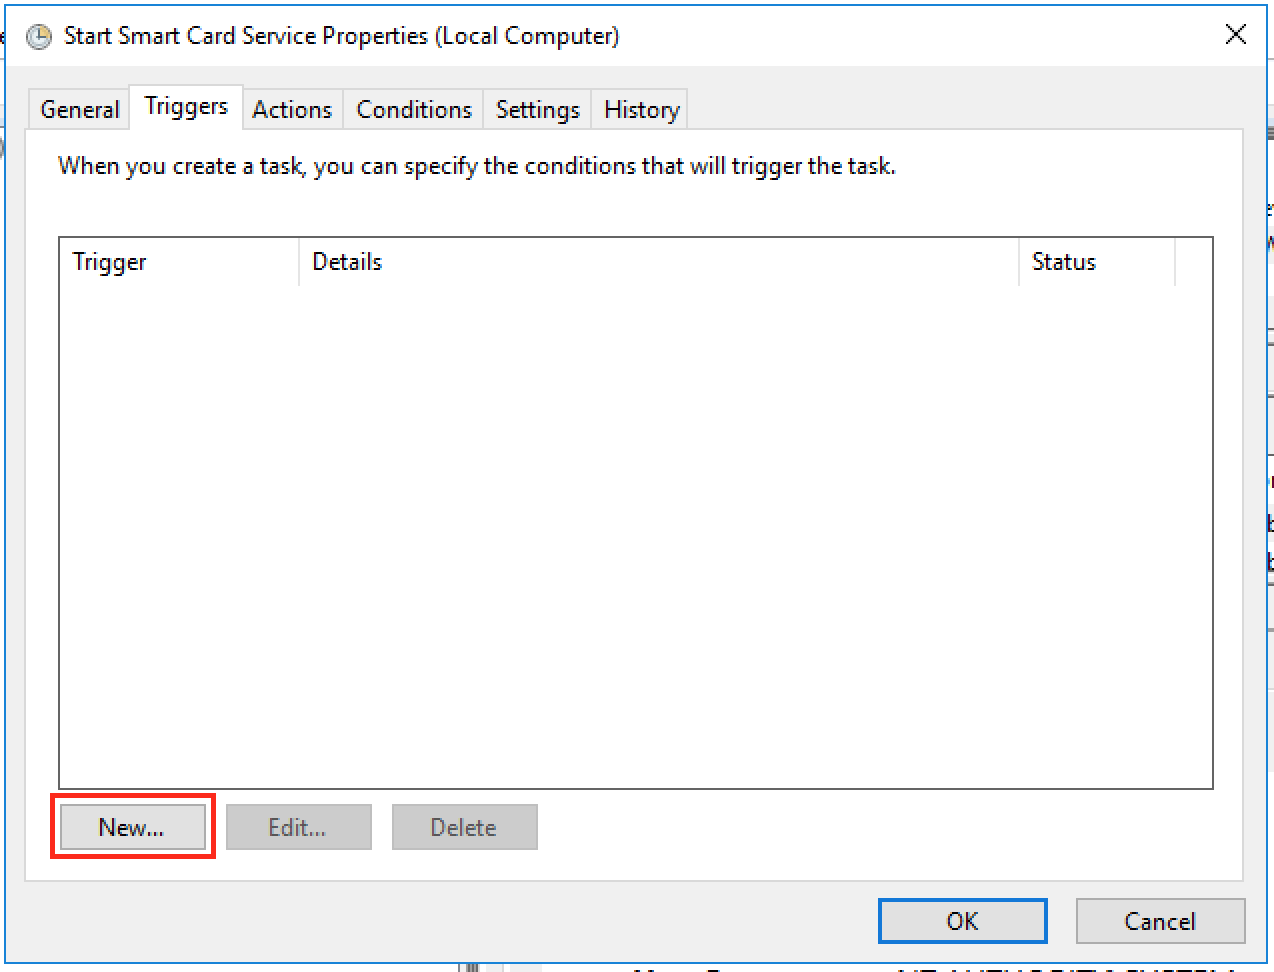
Here click on “New” button to create a new trigger. You will see the following window
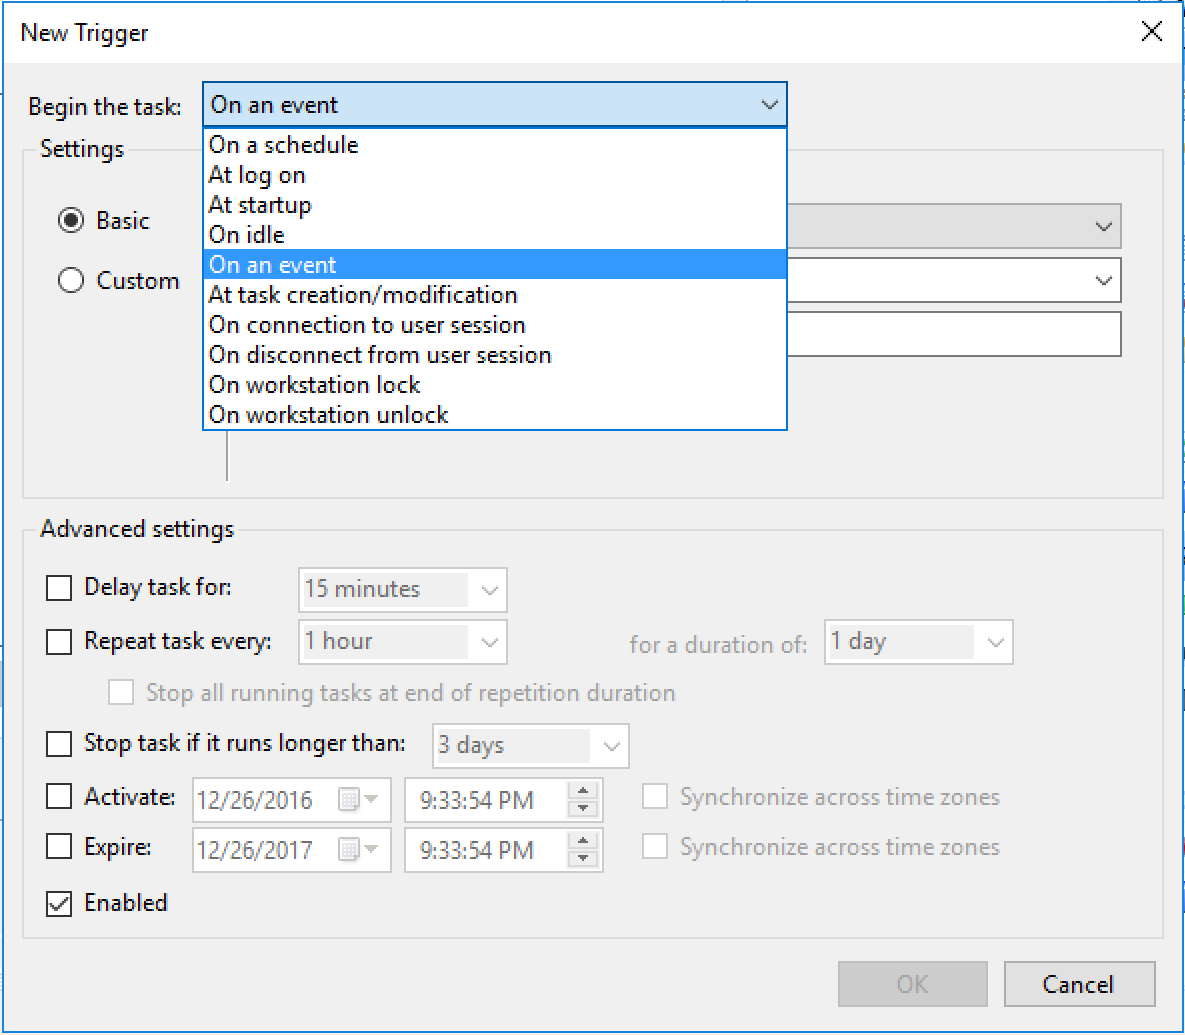
Click on the dropbox next to “Begin the task:” and select “On an event”. We want to start the task on an event.
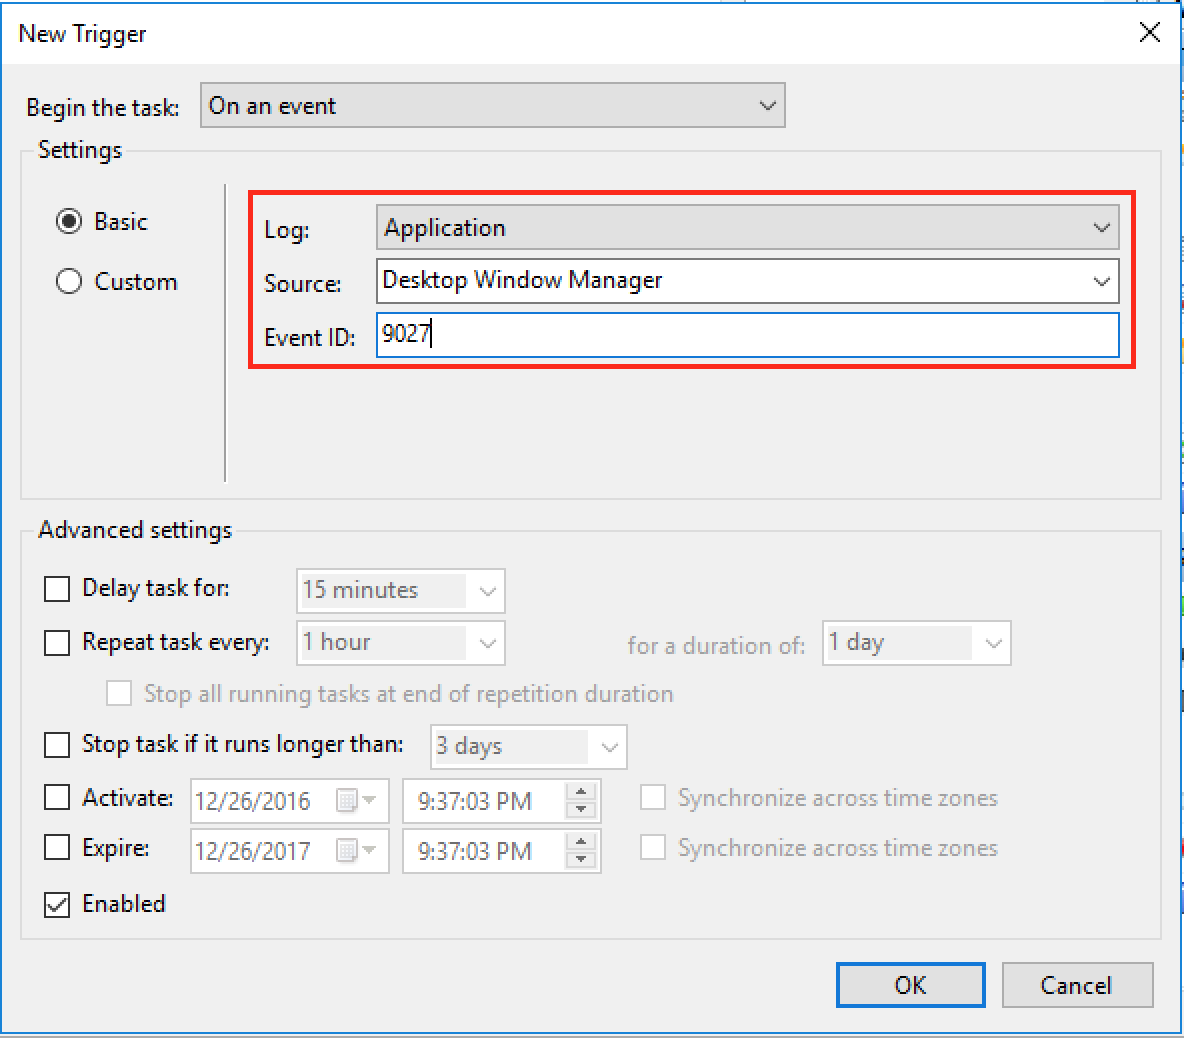
Now in the “Log:” dropbox, select Application
In the “Source:” dropbox, select “Desktop Window Manager”
and in the “Event ID:”, type “9027”.
We saw from the Event Viewer log that the log type of “Application”, Source is “Desktop Window Manager” and Event ID is “9027”. So, we want this task to run on this event only. Now click on “OK” and you will see this trigger added.
Now go to Actions tab
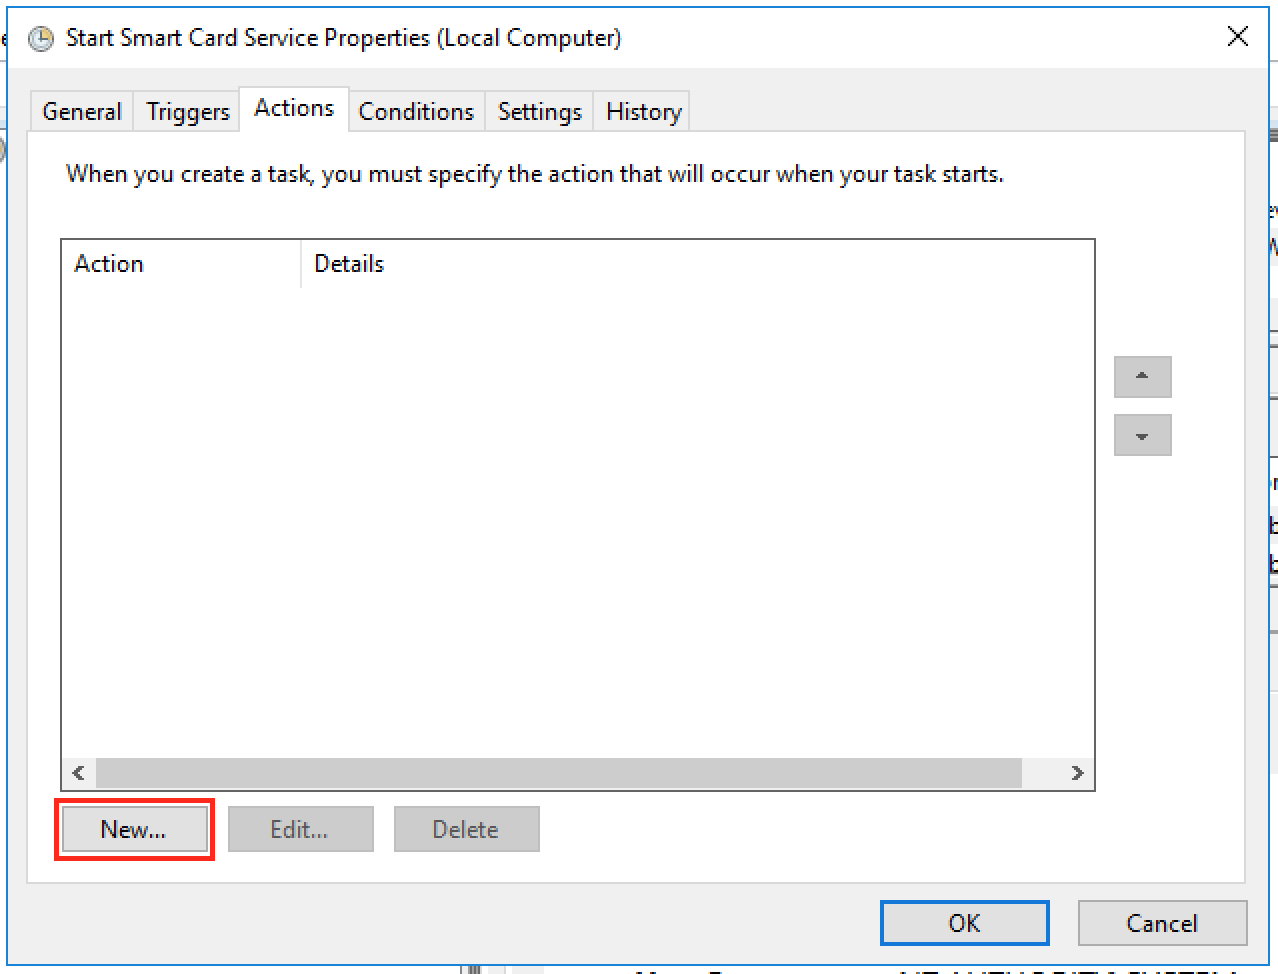
Click on “New” button to add an action.
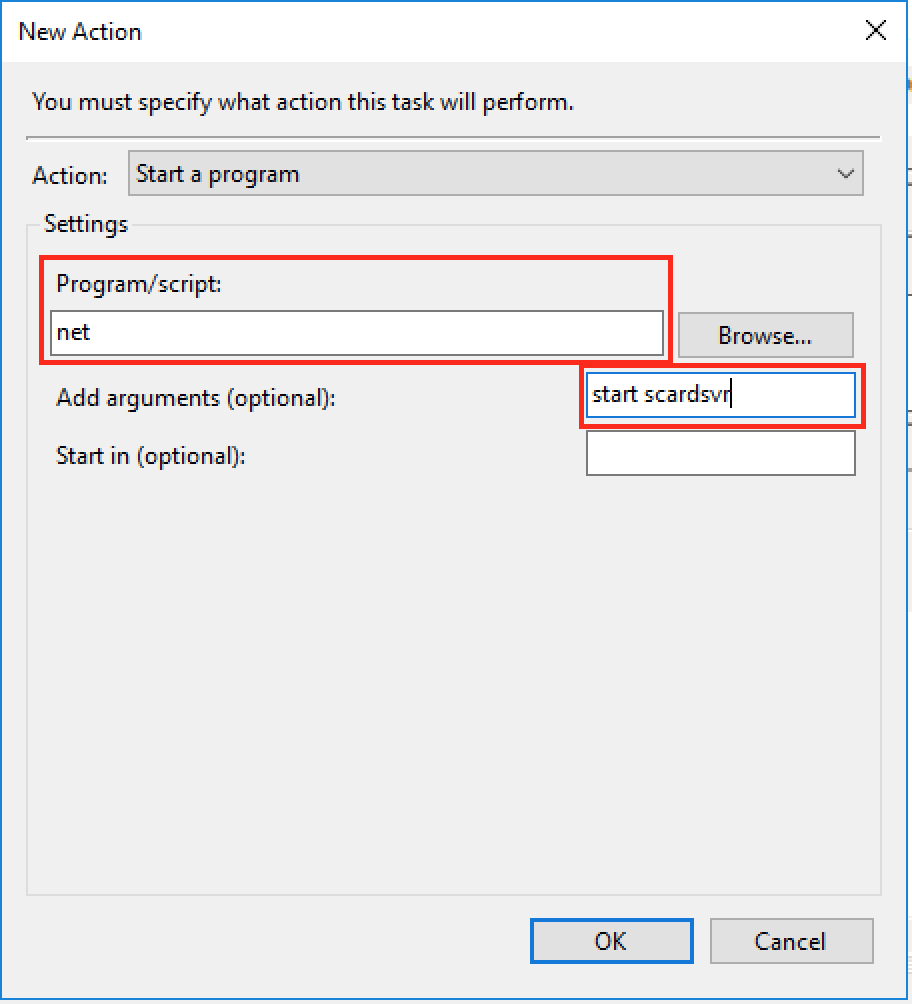
In the “Program/script:”, type “net”. In the “Add arguments (optional):”, type “start scardsvr”. i.e. we want to run “net start scardsvr” to start the Smart Card service. Now click on “OK” to close this window. Everything else can be left as default so you can click on “OK” again to close the properties window.
Now your task is setup and will show up in the list of tasks. This task should start the Smart Card service whenever you connect using Remote Desktop Connection.
Try it, when you connect using Remote Desktop, it should now read the smart card and ask you to enter your PIN, after entering the PIN you should be able to logon to your Windows 10 machine. If it doesn’t work, try taking out the smart card and inserting it again.
Now this resolved my issue with connecting to my Windows 10 Virtual Desktop from my Mac Desktop. But later on I faced another issue, when I lock my Windows 10 machine, after sometime it stops accepting my Smart Card and gives me either “No valid certificates were found on this smart card” or “The requested key container does not exist on the smart card” error. I haven’t found a workaround for this and am still looking to see what event it generates to maybe trigger my task on that event too. But for now, whenever I receive these errors while trying to unlock my Windows 10 machine, I just disconnect the session and reconnect and it works fine. I will update my post if I am able to develop a workaround for this.
This workaround should work on Windows 2012 R2 also, the difference is that Windows 2012 R2 server may generate some other event in the event log other than “9027” and you would have to look for that and configure your task to trigger on that event instead.
If you need help, please don’t hesitate to contact me. I would also like to request that if you find a better workaround, please let me know.
Until Microsoft or Apple (whoevers the issue is) resolves this issue, I am using this workaround.
Thanks for reading my post!
