Powershell

All posts tagged Powershell

Checkpoints (Snapshots) are great feature for saving the state of the Virtual Machine before making changes like applying patches or updates, installing or configuring applications etc. If new changes or updates break the system, we can easily go back to the previous state. To allow this, Hyper-V creates another virtual disk file to store all the changes (in simple words). This causes the file to grow in size and depending on how much change data is being created on the VM it can grow either fast or slow. If the location where the checkpoints are being stored runs out of available free space, Hyper-V will pause the VM. This not only affects the VM that has the growing checkpoint, but also has the potential to affect other VMs that are stored in the same location (Storage Volume/LUN). This process occurs so that the VMs don’t start failing disk writes within the OS of the VM and possibly cause file corruption. To recover from this we have to delete the checkpoints that are not needed anymore. Because of this we have to be very careful when creating checkpoints and remember to delete the checkpoints that are not needed any more.

To avoid this problem and keep a control on the checkpoints I developed a PowerShell script that checks all the checkpoints for all the VMs and deletes the checkpoints that are older X number of day. The attached script currently checks for 3 days or older checkpoints, but this can be easily changed. Also, there can be occasions where we want some checkpoints to stay e.g. if there is a maintenance that is taking longer and we want to keep those checkpoints for longer than 3 days. For adding this function I changed the script to check for a file called “CheckPointsException.txt”, this file will have the names of the all the VMs that have exceptions to keep their checkpoints longer than 3 days. So, for all the VMs that are listed in this file, my script will not delete the checkpoints. Once the maintenance is done we can remove the VM name from this file and next time the scripts runs it will delete the checkpoints for that VM. This script can be add in the Windows Task Scheduler to run every day, or whatever schedule is need. This script also creates an HTML report will a list of VMs with their checkpoints that are older than 3 days and their status (exceptions etc.). It also emails this report to the list of recipients defined in the script. So, this report acts as a reminder that there are checkpoints that are in exceptions list so they are not forgotten.

You can add the Hyper-V Clusters and Standalone hosts at the top of the script. You would also need to set the paths to the reports file and CheckPointsException.txt file.

You can download the script below and rename it to .ps1. Please send me comments.
I recently heard from my colleague that Powershell has been released on Mac OSX and Linux. I wanted to give it a try since I have been using Mac since a few years and have also been using the shell commands. I have worked on several Linux systems in the past several years. I started using Linux when it was all text/shell based and there was no GUI. Therefore I am very comfortable using shell on Linux. Since OSX is very similar to BSD and BSD is a Unix operating system.

I have used Powershell a lot in Windows systems and was excited to try it on my Mac as well as Linux. I thought about writing this article to help others who want to install it and test it on their Mac systems. If time permits, I will also try it on a Linux system and post an article for that.

Installation

So, let’s start with the Powershell for Mac OSX. First you need to download the pkg file from here. Then you can either open the terminal and run the following command:

sudo installer -pkg powershell-x.x.x.pkg -target /

Replace x.x.x with the version no. of the file you downloaded.

Or you can just double-click the powershell-x.x.x.pkg file. When I ran the above command I got the following error:

xxxxx is not in the sudoers file. This incident will be reported.

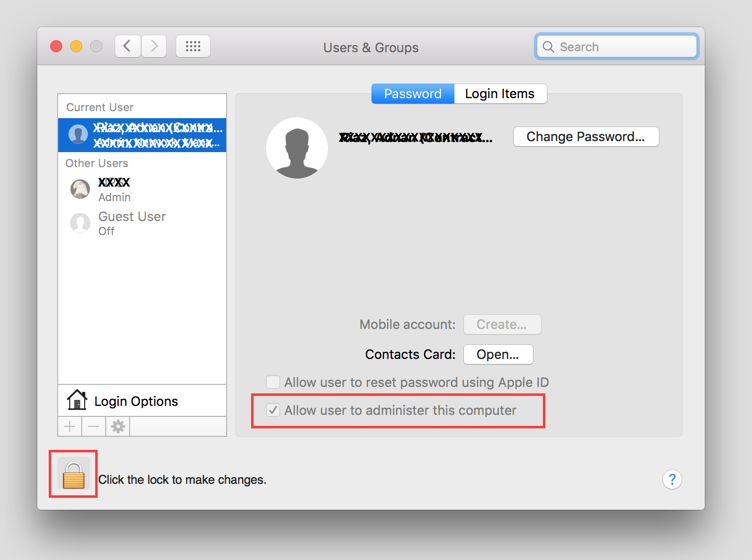
It is pretty easy to resolve this issue. Open “System Preferences”, Click on “Users & Groups”. Select your account, click the lock button on bottom left to unlock it (it will ask you for administrator credentials), then check “Allow user to administer this computer”. Please see the figure below.

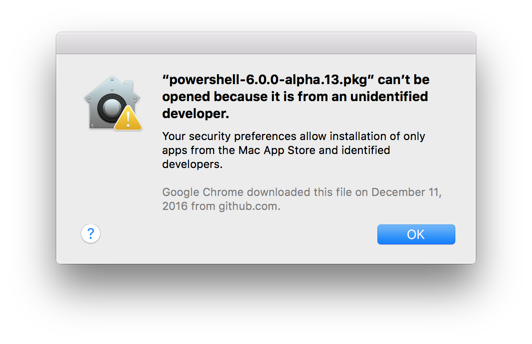
After this you should be able to run the command mentioned above to install Powershell. If you decide to go with the easier route, just double-click on the file to install it. When I tried this, I got the following error:

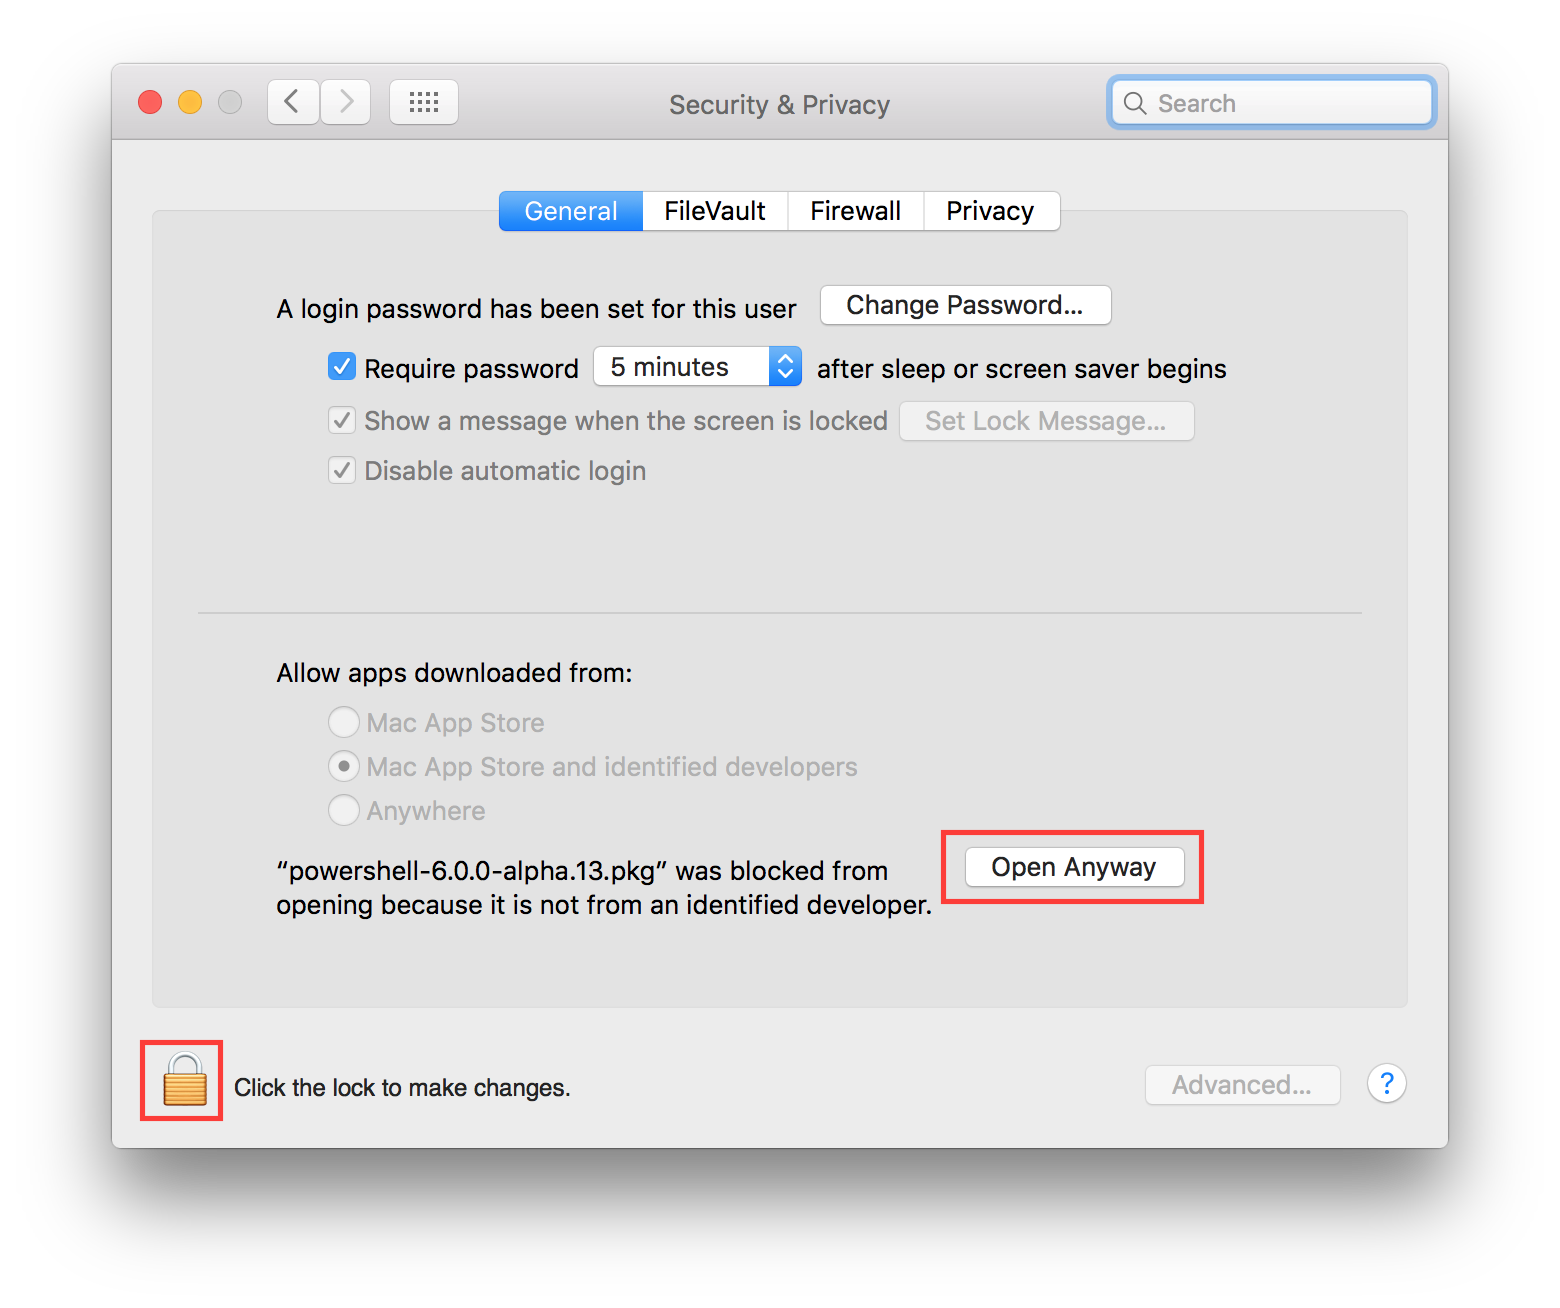
It is easy to resolve this error. Open “System Preferences”, Click on “Security & Privacy”. Click the lock button on bottom left to unlock it. Then click on “Open Anyway”. See the image below:

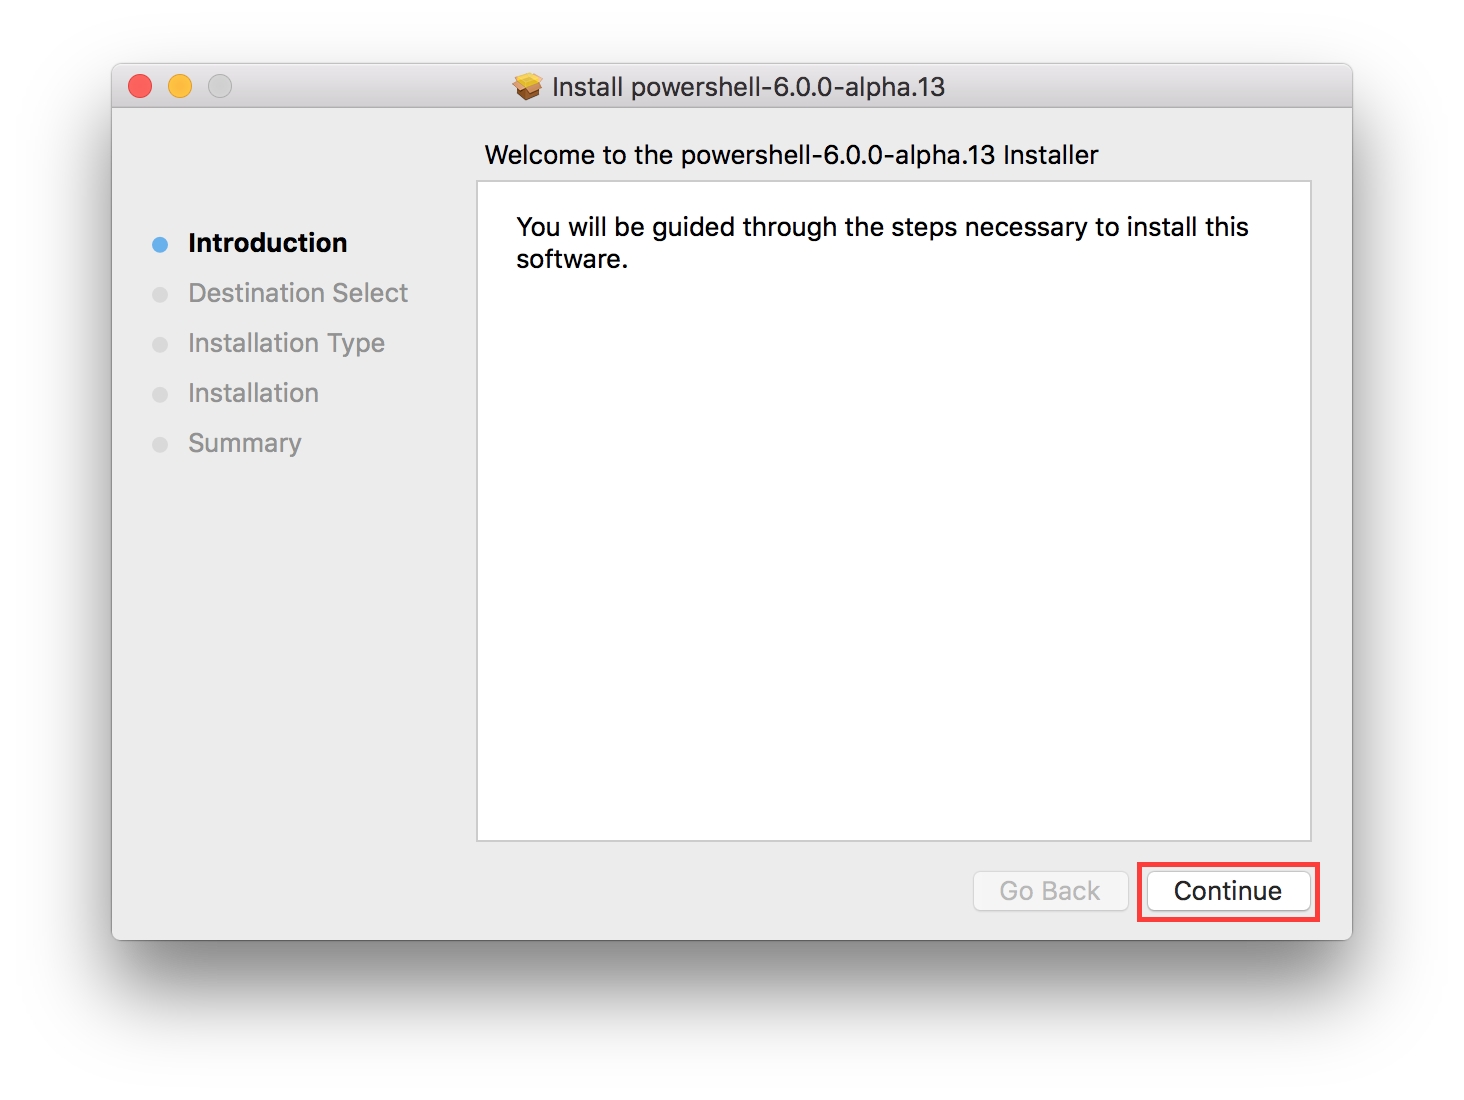
Another way of making it work is to control+click on the .pkg file. The installation will start and you just have to follow the prompts.

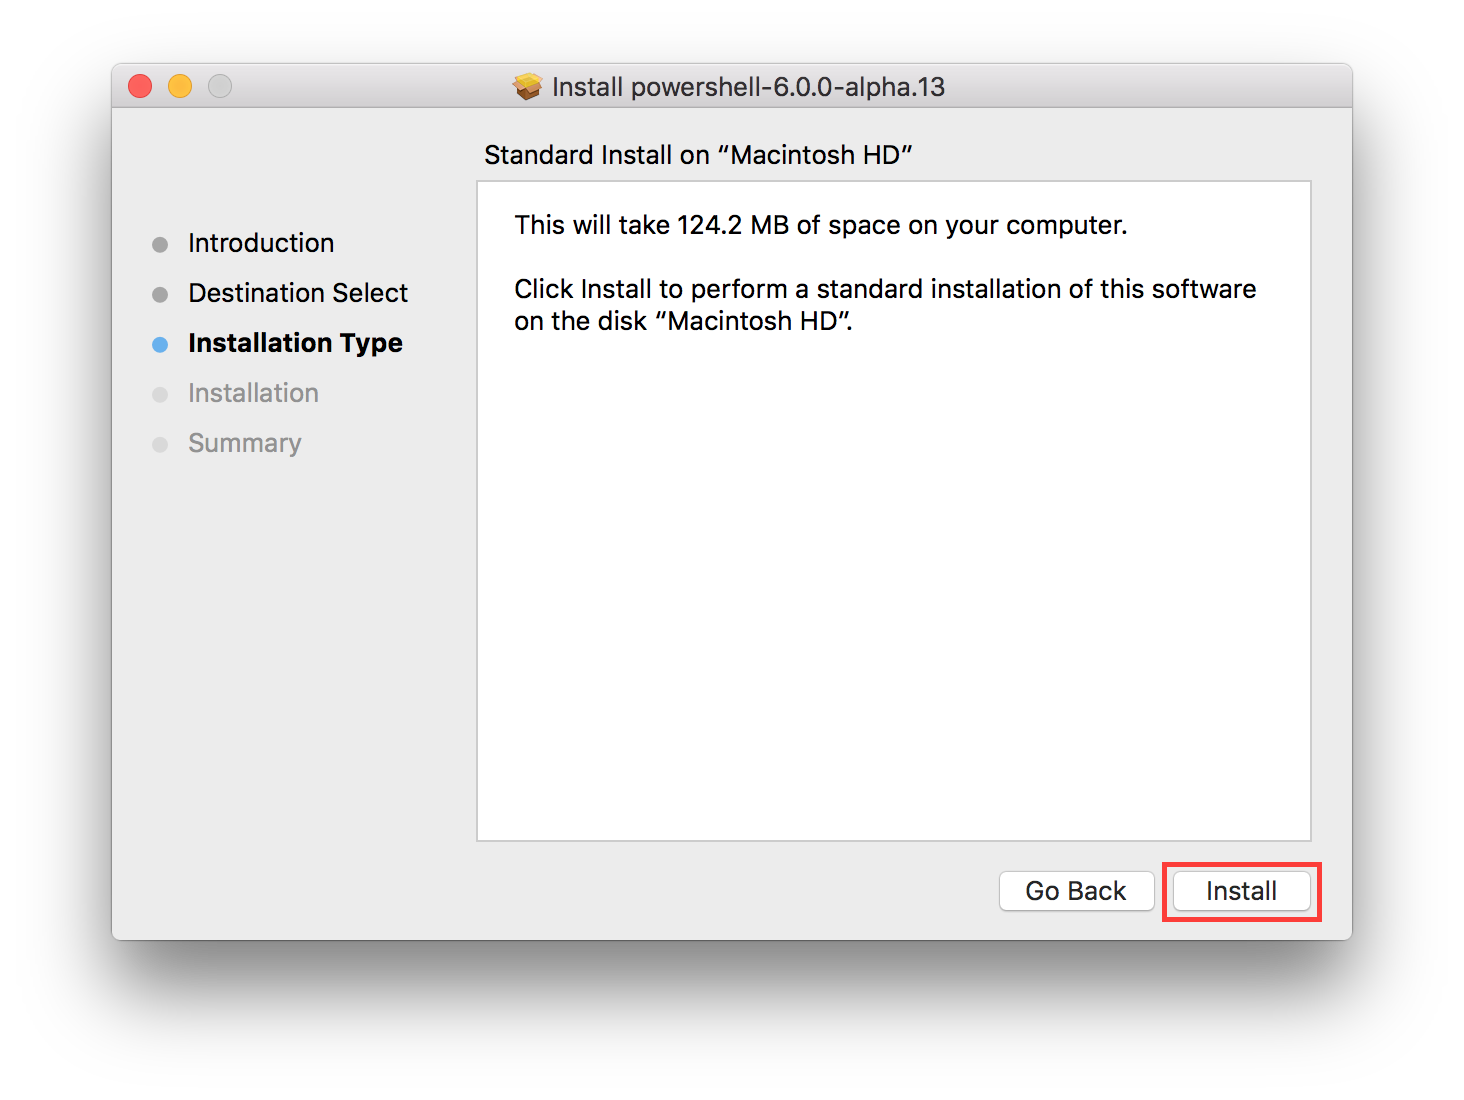
After this you would see a prompt to provide the credentials for administrative privileges and then click on “Install Software”. In a few seconds it will be install and you will get the following prompt:

Now you can click on the “Close” button. Powershell is now installed, you can open the Terminal and type Powershell to launch the powershell process. You will then see the powershell PS prompt. You can run the $PSVersionTable command to see the versions.  You can use the tab button to complete the command like in Windows. Type $psver and press the tab button and you will see that it will complete the command and also change the case, it will complete the command as $PSVersionTable.

You can run Get-Command to see a list of the commands available and Get-Module to see a list of the modules available. Run sw_vers to get the version information.

You can now enjoy exploring Powershell on your Mac.


Uninstallation

Powershell on Mac OSX must be uninstalled manually. To remove the package, run the following command:

sudo rm -rf /usr/local/bin/powershell /usr/local/microsoft/powershell