I recently heard from my colleague that Powershell has been released on Mac OSX and Linux. I wanted to give it a try since I have been using Mac since a few years and have also been using the shell commands. I have worked on several Linux systems in the past several years. I started using Linux when it was all text/shell based and there was no GUI. Therefore I am very comfortable using shell on Linux. Since OSX is very similar to BSD and BSD is a Unix operating system.
I have used Powershell a lot in Windows systems and was excited to try it on my Mac as well as Linux. I thought about writing this article to help others who want to install it and test it on their Mac systems. If time permits, I will also try it on a Linux system and post an article for that.
Installation
So, let’s start with the Powershell for Mac OSX. First you need to download the pkg file from here. Then you can either open the terminal and run the following command:
sudo installer -pkg powershell-x.x.x.pkg -target /
Replace x.x.x with the version no. of the file you downloaded.
Or you can just double-click the powershell-x.x.x.pkg file. When I ran the above command I got the following error:
xxxxx is not in the sudoers file. This incident will be reported.
It is pretty easy to resolve this issue. Open “System Preferences”, Click on “Users & Groups”. Select your account, click the lock button on bottom left to unlock it (it will ask you for administrator credentials), then check “Allow user to administer this computer”. Please see the figure below.
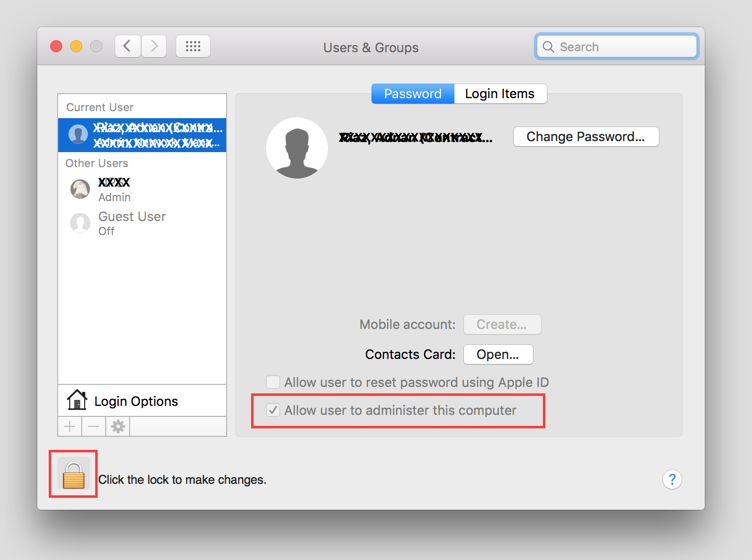
After this you should be able to run the command mentioned above to install Powershell. If you decide to go with the easier route, just double-click on the file to install it. When I tried this, I got the following error:
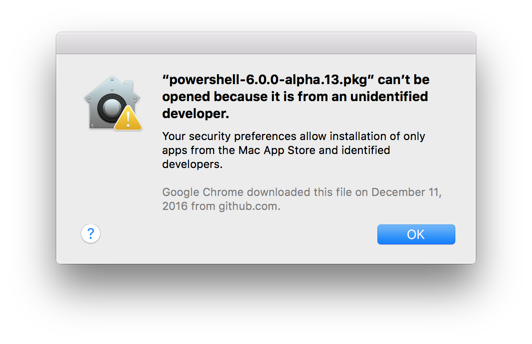
It is easy to resolve this error. Open “System Preferences”, Click on “Security & Privacy”. Click the lock button on bottom left to unlock it. Then click on “Open Anyway”. See the image below:
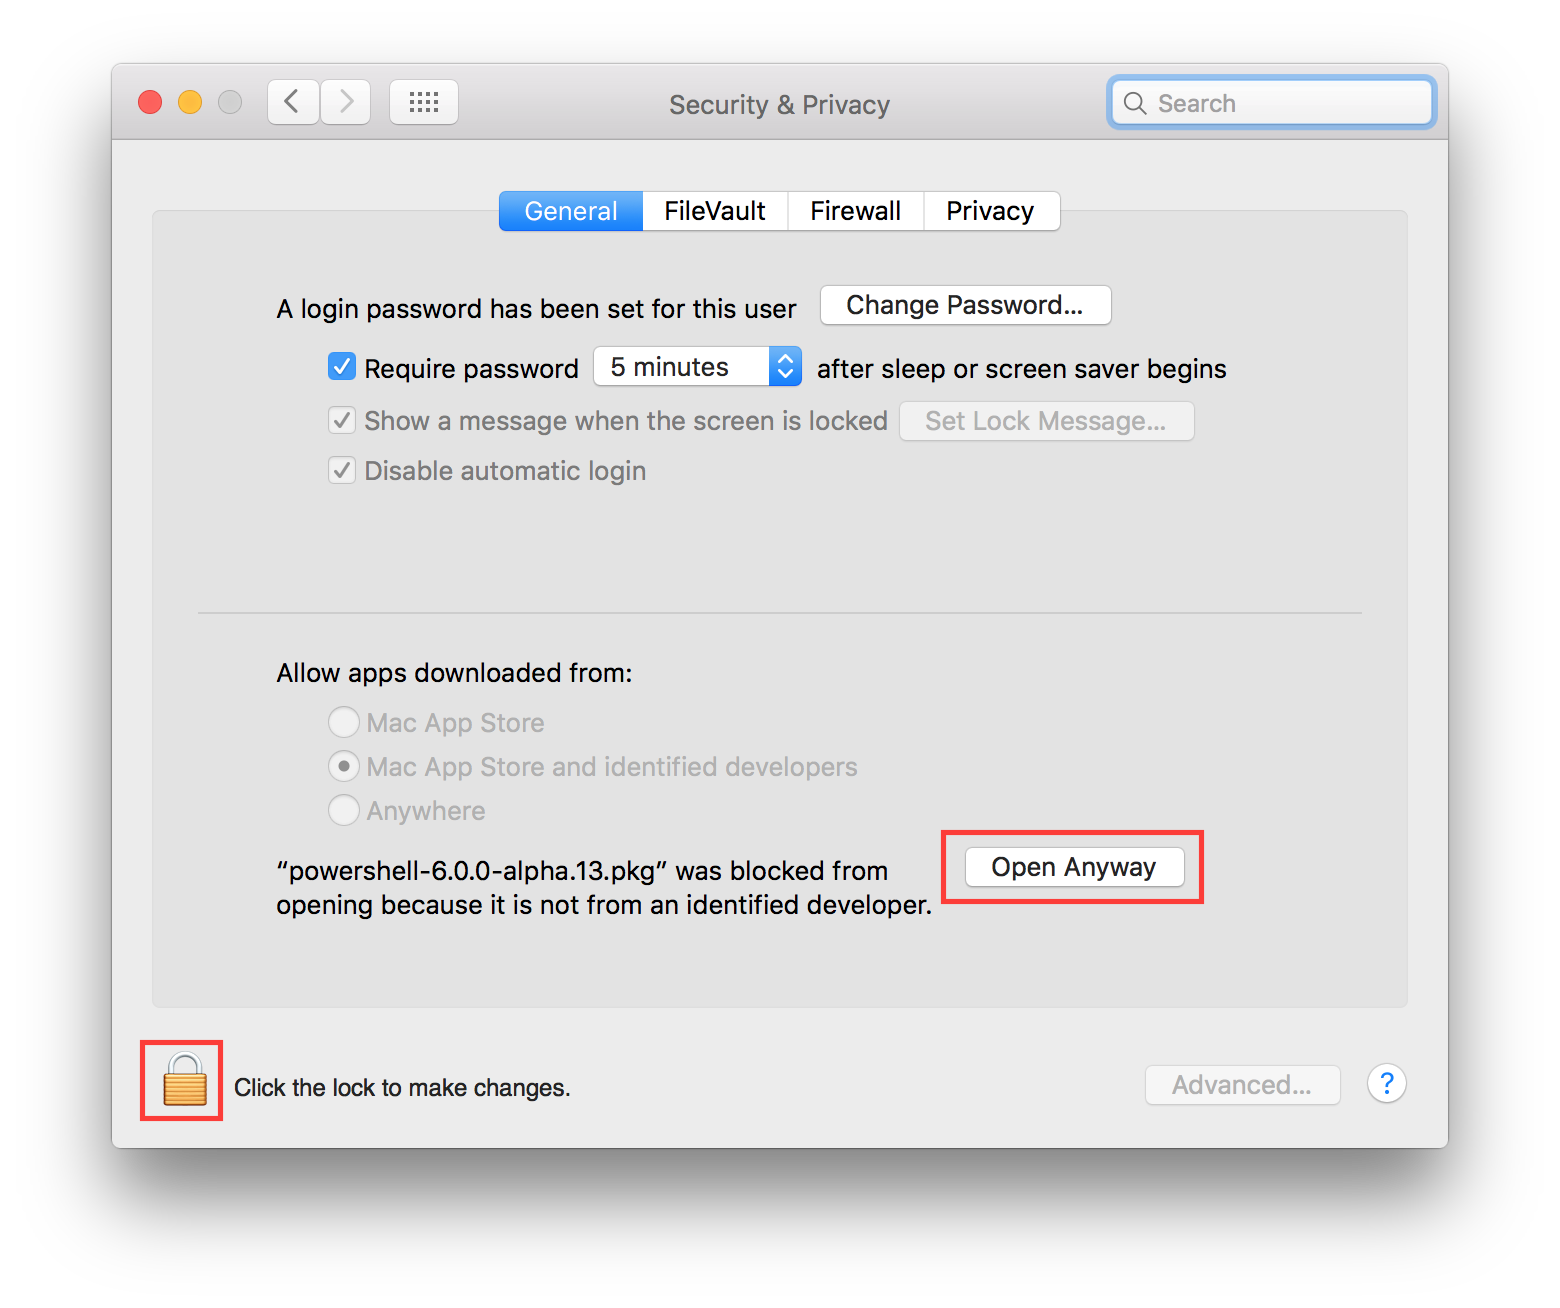
Another way of making it work is to control+click on the .pkg file. The installation will start and you just have to follow the prompts.
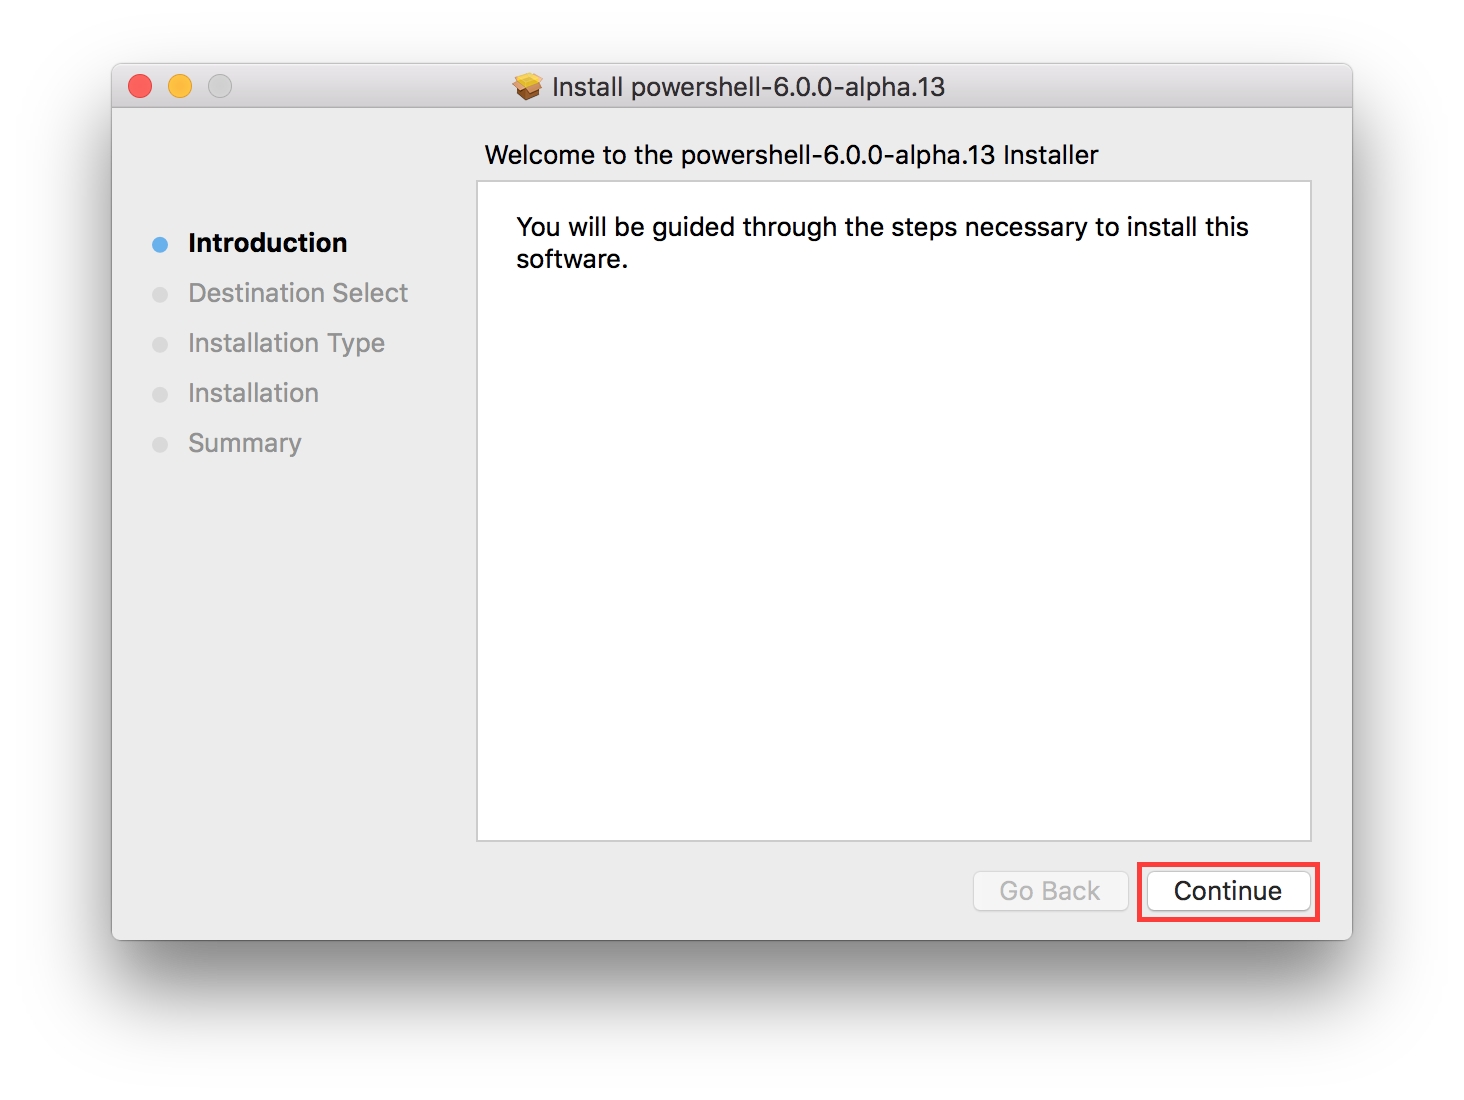
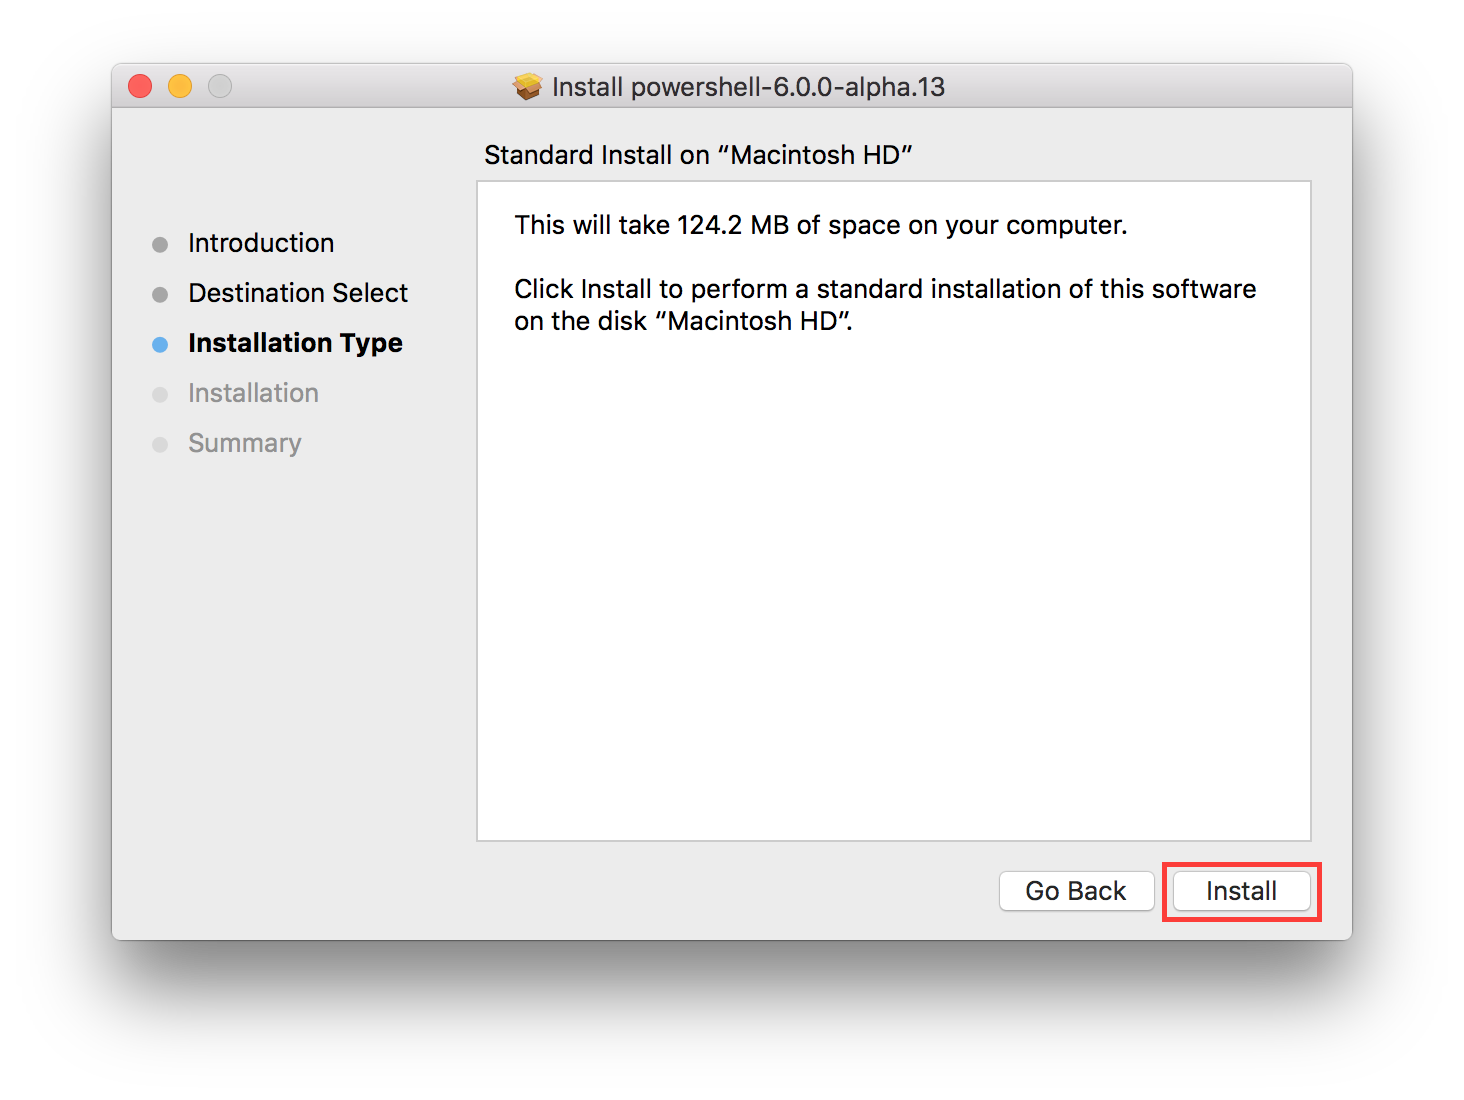
After this you would see a prompt to provide the credentials for administrative privileges and then click on “Install Software”. In a few seconds it will be install and you will get the following prompt:

Now you can click on the “Close” button. Powershell is now installed, you can open the Terminal and type Powershell to launch the powershell process. You will then see the powershell PS prompt. You can run the $PSVersionTable command to see the versions. You can use the tab button to complete the command like in Windows. Type $psver and press the tab button and you will see that it will complete the command and also change the case, it will complete the command as $PSVersionTable.
You can run Get-Command to see a list of the commands available and Get-Module to see a list of the modules available. Run sw_vers to get the version information.
You can now enjoy exploring Powershell on your Mac.
Uninstallation
Powershell on Mac OSX must be uninstalled manually. To remove the package, run the following command:
sudo rm -rf /usr/local/bin/powershell /usr/local/microsoft/powershell
